
Quick answer: Double-curved aluminum ceiling panels are solid aluminum modules formed so the visible surface changes in two directions. Unlike a single-curved panel, which follows one principal bend, a double-curved module needs a coordinated 3D control surface, practical panel segmentation, joint datums, service openings and a defined support interface. Punchuk can review these inputs for custom fabrication, coating, inspection, numbered packing and export delivery.
What Punchuk can coordinate
Punchuk can support drawing development, 3D model review, unfolded panel layouts, CNC cutting, forming, welded reinforcement, coating, quality inspection, protective packing and export delivery for custom formed aluminum ceiling and column cladding work. The final manufacturing route depends on the approved geometry, finish and connection detail.
Image note: the photographs on this page are architectural application references. They are not presented as a named Punchuk project or as evidence of a confirmed client, location, quantity, material thickness or finish.
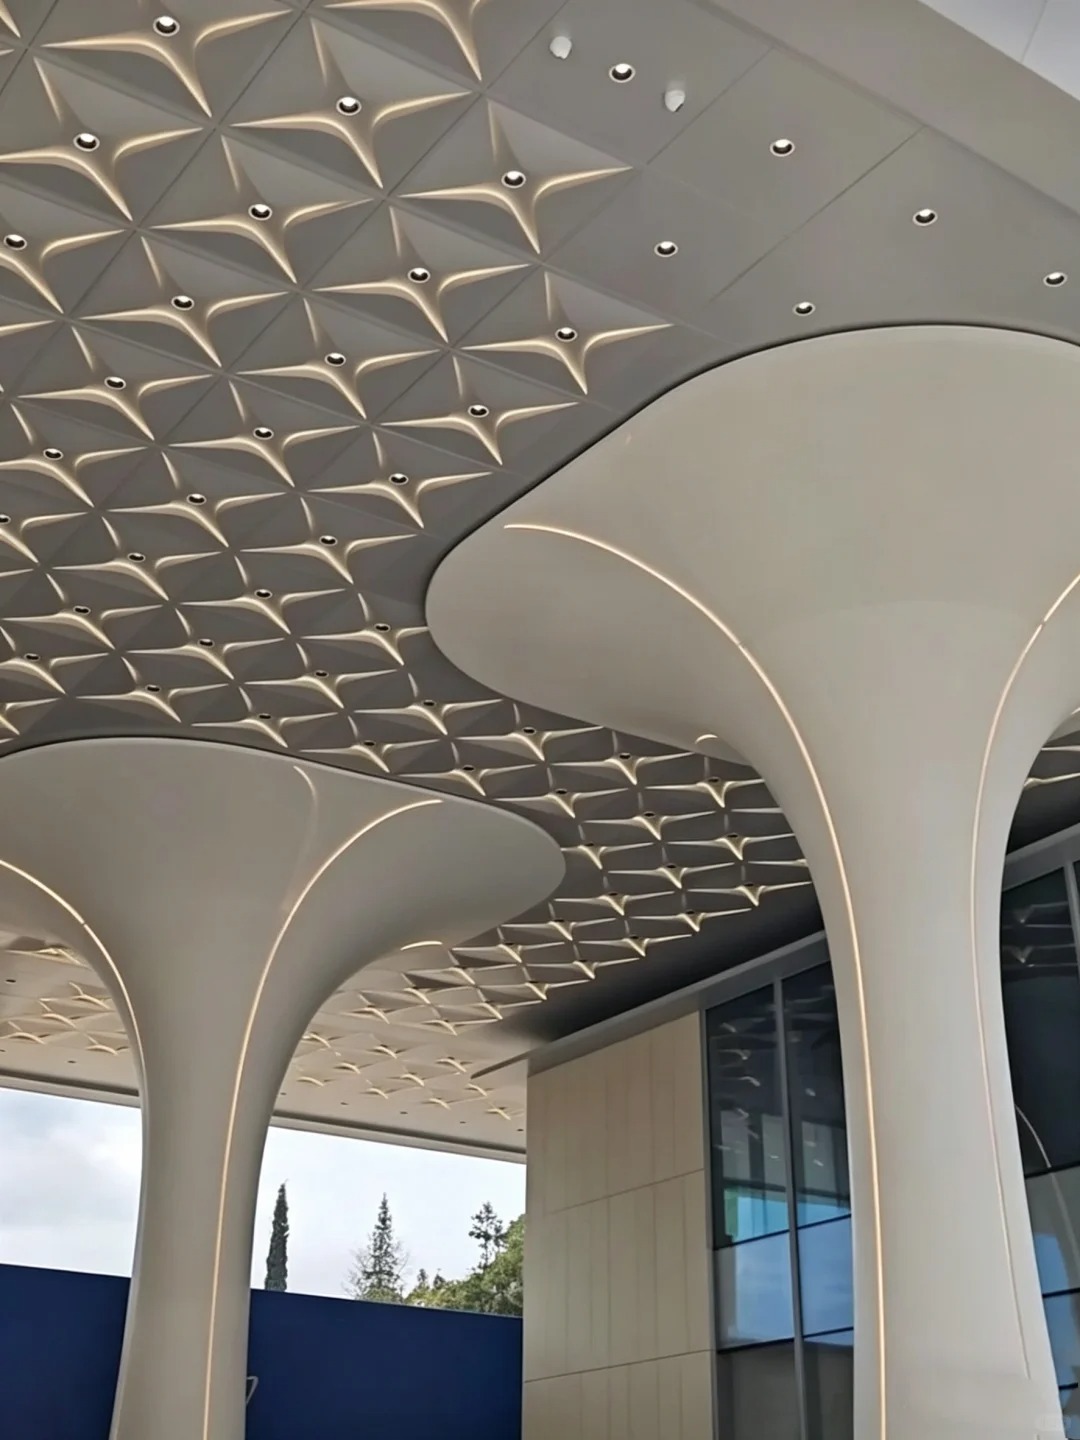
This technical guide is for architects, interior designers, ceiling contractors and procurement teams comparing custom aluminum ceiling systems, 實心鋁板 and formed column cladding. Its focus is continuous curvature in two directions. A ceiling assembled from separate flat planes belongs to the 3D faceted aluminum ceiling design route instead.
What is a double-curved aluminum ceiling panel?
A double-curved panel changes shape in two surface directions. Its geometry cannot be described by one bend radius alone. The release information normally comes from a coordinated 3D surface, sections, control points and agreed panel boundaries. Joint width, panel orientation, service openings and the support interface need to be resolved before fabrication.
The ceiling may transition into a column cover, turn around an edge, frame a lighting zone or meet flatter perimeter panels. Each transition affects the panel split and the hidden fixing detail.
Single-curved versus double-curved panels
The terms describe geometry, not visual quality. Confirming the surface type early helps the design team send the right information and prevents a single radius from being used to describe a surface that changes in two directions.
| Coordination point | Single-curved panel | Double-curved panel |
|---|---|---|
| Surface definition | One principal bend or a developable curved surface. | Curvature changes across two surface directions. |
| Useful design data | Radius, arc or chord, section, straight-edge direction and fixing datum. | 3D control surface, sections, control points, panel boundaries and datums. |
| Panel planning | Often follows repeated radii and straight joint lines. | Usually needs closer review of module families, edge conditions and shape change between adjacent panels. |
| Production control | Radius and profile templates can control the formed section. | Templates, 3D checks or a trial assembly may be needed, depending on the geometry and tolerance requirements. |
Panel dimensions and module segmentation
There is no universal maximum module size for every double-curved ceiling. The practical size comes from the design surface, the available blank, forming and coating limits, finished-panel stiffness, transport protection, lifting access and the sequence on site. Large visual areas can be divided into repeatable module families without treating every panel as identical.
A useful segmentation review checks the following items:
- Place joints along approved visual lines and keep them clear of tight shape changes where possible.
- Group panels by geometry and orientation so drawings, labels, inspection records and packing lists use the same identification.
- Check blank dimensions and formed depth against the proposed fabrication route before freezing panel boundaries.
- Allow for coating racks, protective packing, crate openings, site lifting and the route from unloading point to final position.
- Coordinate perimeter closures, column transitions, access modules and service openings as separate conditions rather than trimming them late on site.
該 3D aluminum ceiling coordination and panel segmentation guide explains how to organize module families, numbered plans, joints, MEP openings and production release drawings.
Design and installation coordination
The ceiling geometry, support frame and building services must refer to the same datums. Before production release, compare the coordinated model with ceiling plans, sections and the latest site survey. Any difference between the design surface and the installed subframe should be resolved in the drawings, not absorbed unpredictably at the visible joints.
- Datums and control points: record levels, grid references, spring points, panel corners and transition lines that the site team can set out.
- Support interface: define bracket locations, fixing zones, adjustment allowance, access direction and the party responsible for the secondary frame.
- Lighting and services: coordinate linear lights, downlights, sprinklers, grilles, detectors and removable access panels before CNC cutting.
- Tolerance and joints: review cumulative grid tolerance, joint width, perimeter shadow gaps and the clearance needed to install or remove a panel.
- Installation sequence: use numbered panels and zone-based packing so transition pieces and service modules reach the site in the required order.
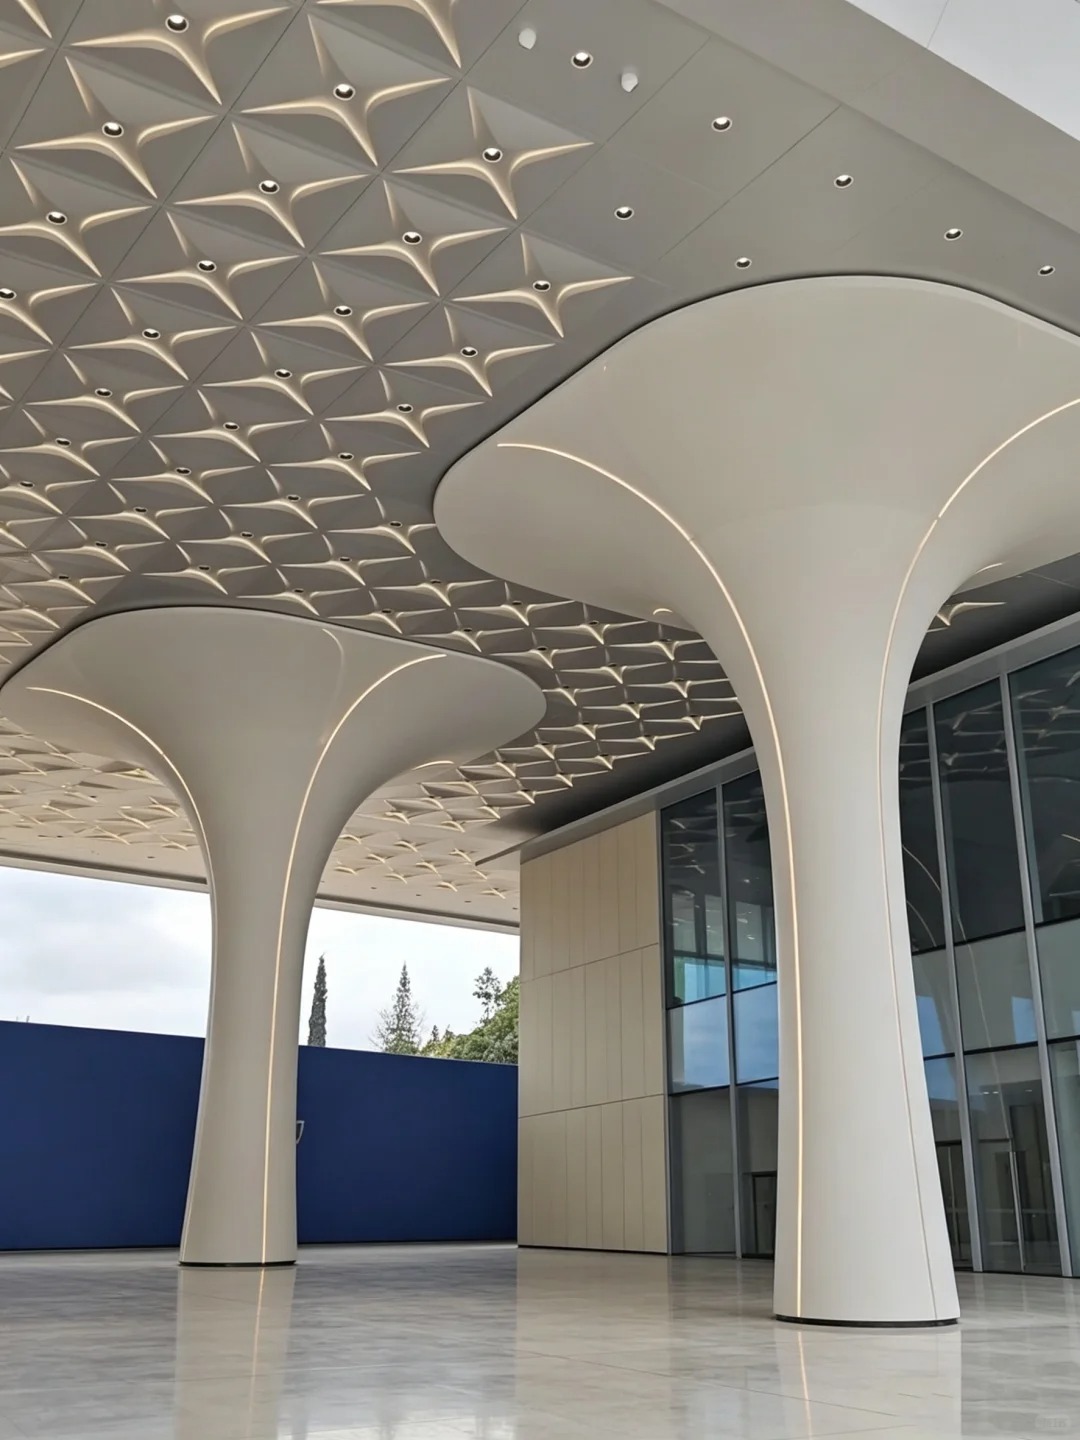
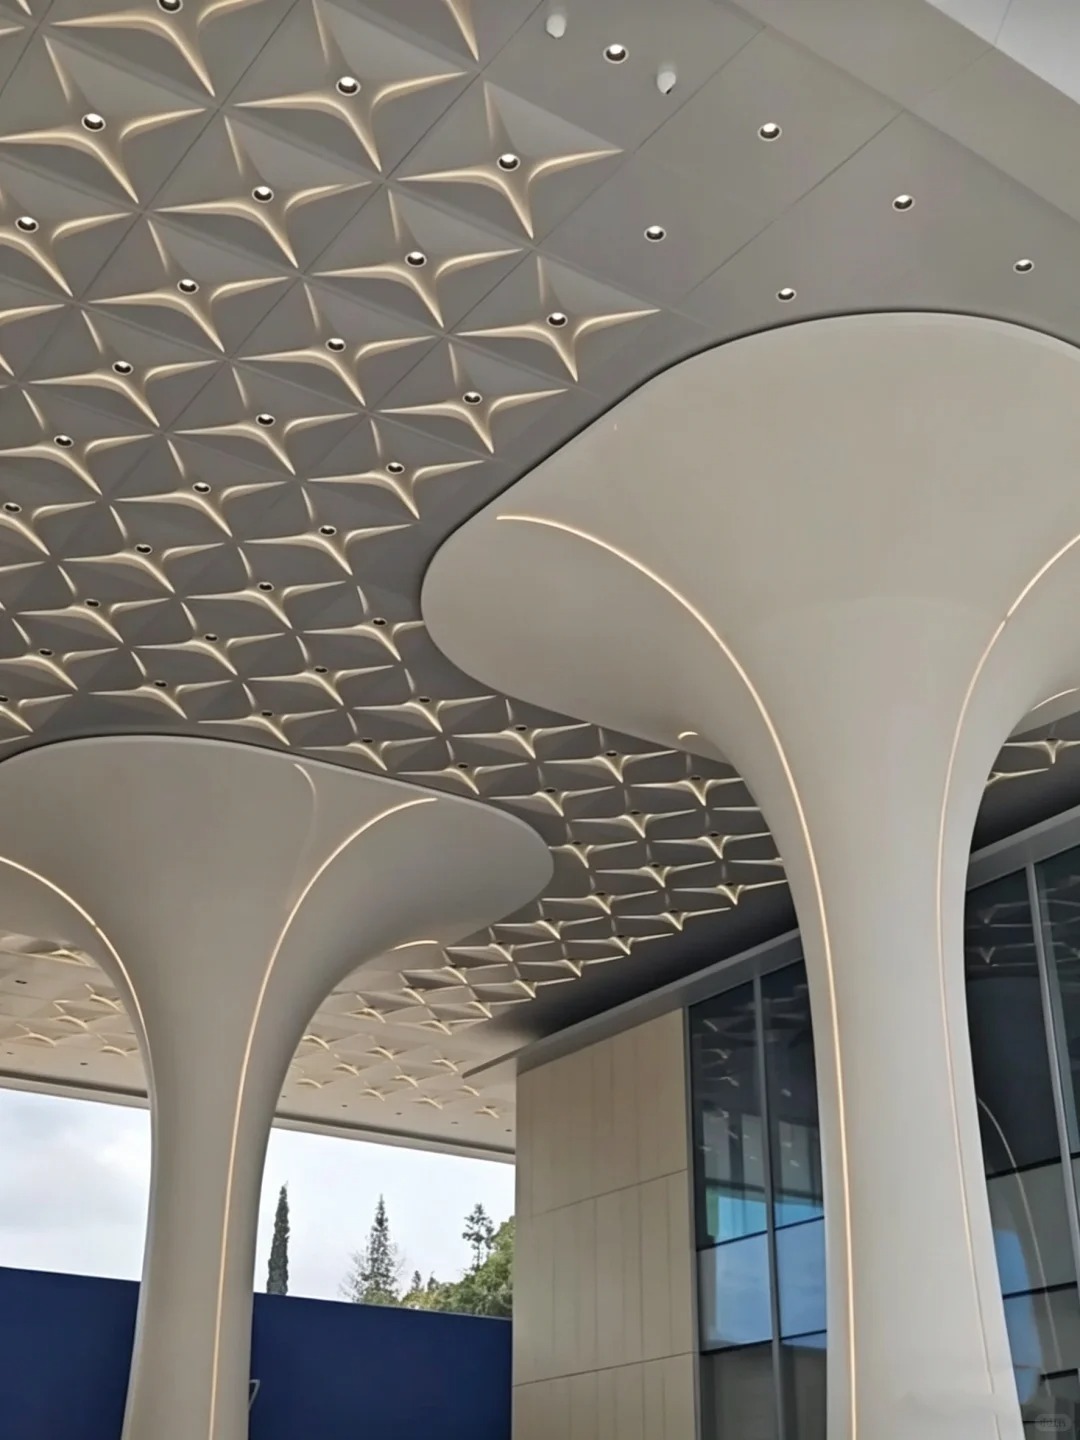
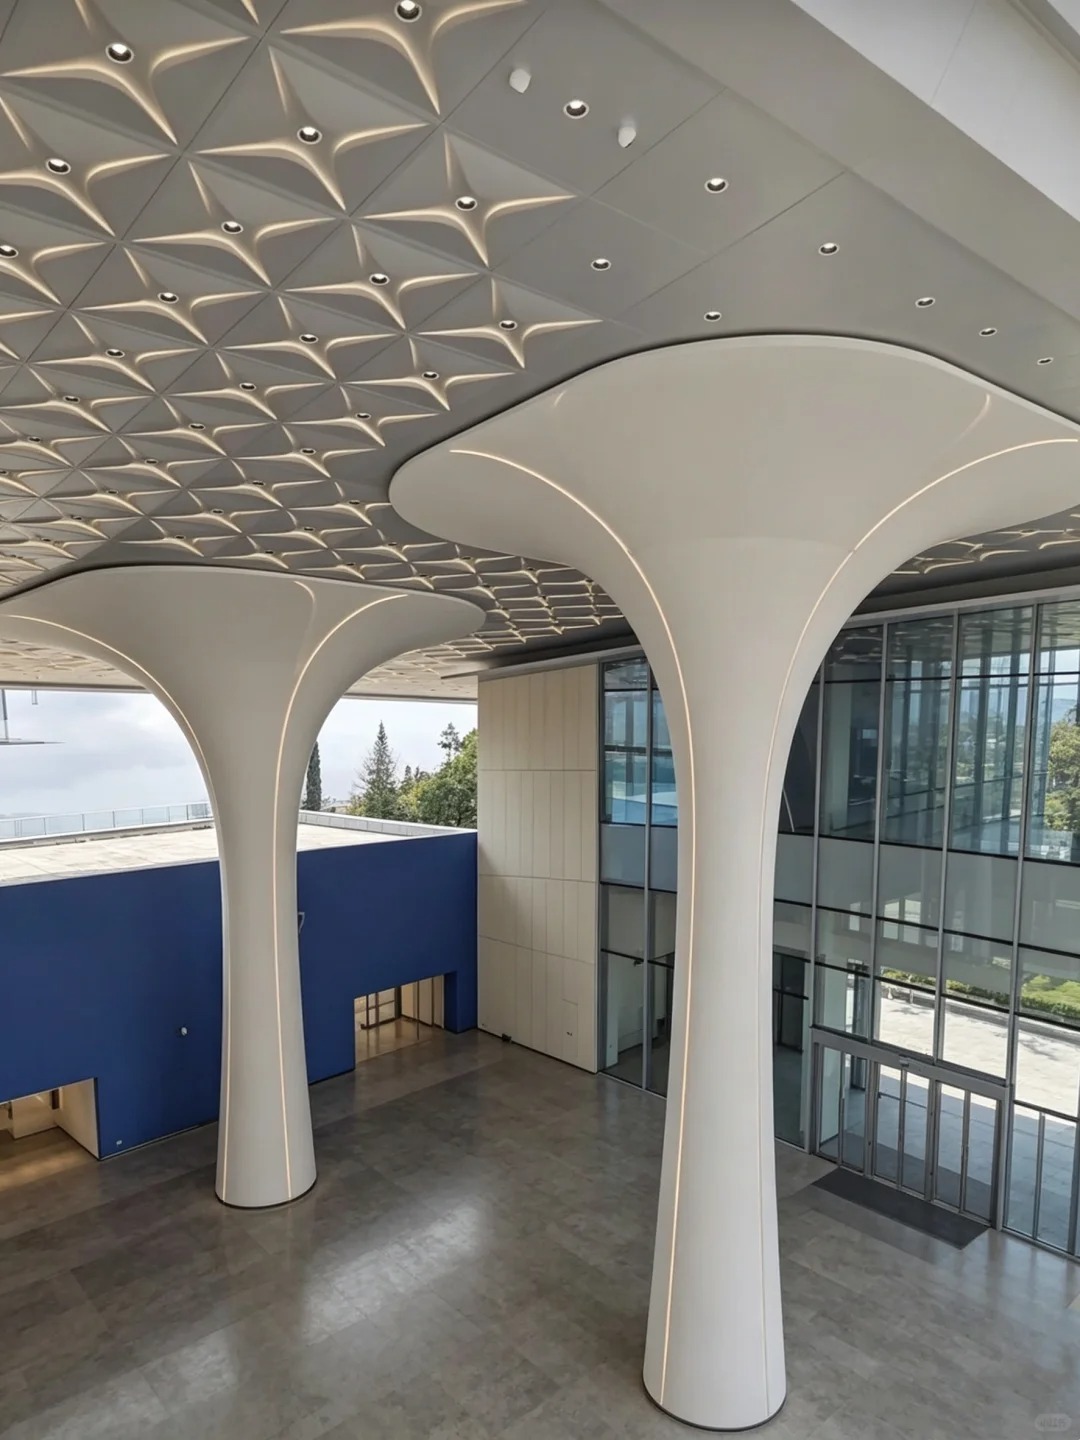
Fabrication workflow for custom formed ceilings
- Review the source information. Check the 3D surface, plans, sections, panel grid, service openings, finish and support assumptions. Record missing information rather than estimating it as approved fact.
- Develop module families. Set panel boundaries, joint directions, folded returns, fixing zones and identification codes. Confirm that each module can be formed, coated, packed and handled.
- Approve a sample or trial assembly when needed. Use it to check geometry, a critical joint, the coating appearance or an interface with lighting and access panels.
- Cut and form the panels. CNC-cut blanks, openings and fixing features, then use the forming route approved for the geometry.
- Add specified reinforcement and finish. Complete welded or folded details, prepare the surface and apply the approved coating system.
- Inspect, label and pack. Check dimensions, geometry, visible finish, edge treatment and panel identification. Pack by zone and installation sequence.
See the Punchuk solid aluminum panel manufacturing capability page for the broader drawing, fabrication, coating, inspection and export support scope.
General thickness guidance
Solid aluminum thicknesses of 2.0 mm, 2.5 mm and 3.0 mm are common comparison points, not a fixed specification for the reference images on this page. Selection depends on panel dimensions, curvature, formed depth, folded returns, reinforcement, support spacing, openings, handling and the project engineer’s requirements.
| Starting point | General review |
|---|---|
| 2.0 mm solid aluminum | May be reviewed for smaller protected interior modules when the geometry and support detail provide adequate stiffness. |
| 2.5 mm solid aluminum | A middle comparison point for many decorative ceiling, column cover and feature panel applications. |
| 3.0 mm solid aluminum | Often reviewed for larger modules, deeper forming, wider support spacing or higher handling stiffness. |
For a wider comparison, read the 鋁覆層板厚度指南. Final selection must follow the approved project specification and engineering review.
Where double-curved ceiling systems are used
- Hotel lobbies, reception areas and entrance canopies
- Atriums, sales centres and public building entrances
- Airport, rail and other transport interior feature zones
- Retail entrances and commercial interiors
- Column cladding, ceiling transitions and formed soffits
Compare other aluminum ceiling and cladding routes in the Punchuk products directory, or review documented applications in Punchuk projects.
Drawings and information to send for quotation
An early budget review can begin with concept information, but production release needs coordinated and approved geometry. Mark each item as confirmed or pending when you send the package.
- Reflected ceiling plan, elevations, sections and the latest 3D model when available
- Grid datums, control points, radius information where applicable and proposed panel boundaries
- Panel identification, approximate dimensions, quantities and required joint width
- Material thickness or performance requirement, folded returns, reinforcement and fixing concept
- Finish system, color reference, gloss requirement and approved sample status
- Lighting, sprinklers, grilles, detectors, access panels and other openings
- Support frame interface, site survey status, installation responsibility and tolerance requirements
- Project country, delivery address, packing constraints and required schedule
該 custom aluminum panel quotation checklist provides a broader list for mixed ceiling and cladding packages.
Frequently asked questions
How is a double-curved panel different from a single-curved panel?
A single-curved panel follows one principal bend and can usually be controlled with radius, arc or chord data and a section. A double-curved panel changes across two surface directions, so it normally needs a coordinated 3D control surface, panel boundaries, sections and agreed datums.
How are module dimensions and panel splits decided?
Module size is checked against the design surface, blank dimensions, forming and coating limits, stiffness, joints, transport protection, lifting access and the installation sequence. There is no single maximum size that applies to every double-curved ceiling.
What must be coordinated before installation?
Confirm site datums, the latest survey, subframe and bracket interfaces, joint tolerance, perimeter closures, lighting and service openings, access direction, panel numbering and the installation sequence before releasing the panels for production.
What drawings should a buyer send for quotation?
Send the reflected ceiling plan, elevations, sections, a 3D model when available, proposed panel grid, control points, thickness or performance requirement, finish, service openings, fixing concept, quantities, destination and schedule. Mark information that is still pending.
Which aluminum thickness suits a double-curved ceiling?
2.0 mm, 2.5 mm and 3.0 mm are common comparison points. The final thickness depends on panel dimensions, curvature, formed depth, folded returns, reinforcement, support spacing, openings, handling and the project engineering requirements.
Discuss a double-curved ceiling drawing
Send the ceiling plan, sections, 3D model, proposed panel grid, finish target, approximate quantities and project destination. Punchuk can identify missing coordination items and review a practical fabrication route before quotation.
Technical content by Jack Leung, Punchuk project contact for drawings, quotations and technical coordination.
 Chinese
  English
  Vietnamese
  Malay
Malay  Indonesian
  Arabic
  Thai
Thai  Russian
  Kazakh
  Spanish